Pottery Cherry Blossoms for UCHMB's Bereavement Wall
The University of California Health Milk Bank (UCHMB) began in 2019 to safely and reliably convert donated breast milk into nourishment for babies who lack a sufficient breast milk supply. Alex, UCHMB’s Coordinator/Marketing, originally approached me at the end of 2020 to create small hearts as remembrance keepsakes for bereaved donors. I am so honored to have a small part of what UCHMB does.
Find out more about the UCHMB program at
Their website https://uchealth.service-now.com/csp?id=mb_about_us
https://health.universityofcalifornia.edu/patient-care/milk-bank
Instagram https://www.instagram.com/ucmilkbank
Facebook https://www.facebook.com/ucmilkbank/
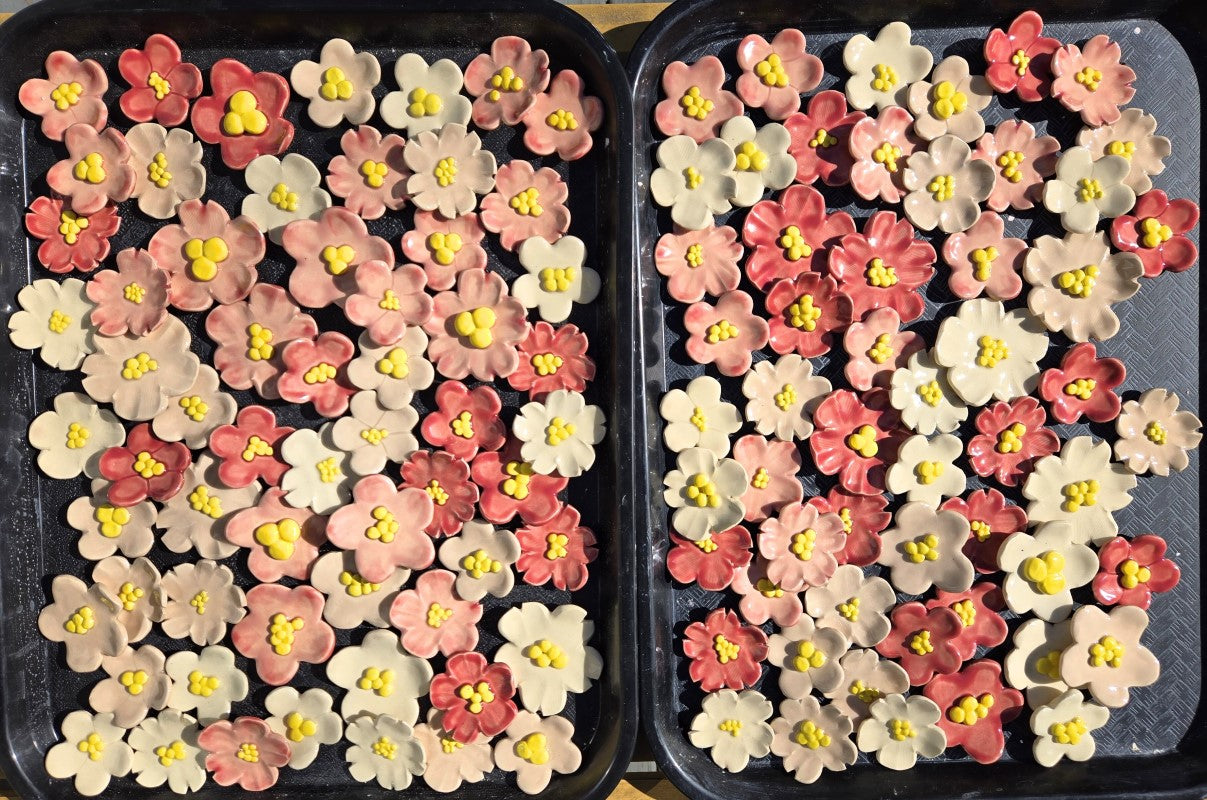
Recently they decided to create a memorial wall of cherry blossoms, and asked me to experiment with flower designs. Japanese Cherry Blossoms are symbolic of the impermanence and transience that are integral elements of the beauty of life (see Wikipedia “cherry blossom”). Both the remembrance hearts and these cherry blossoms are significant in the concepts they represent, and part of that significance is that they are each individually and distinctly made by a person’s hands out of a fragile material that originates as a reincarnation of the eroded rocks of the earth itself.
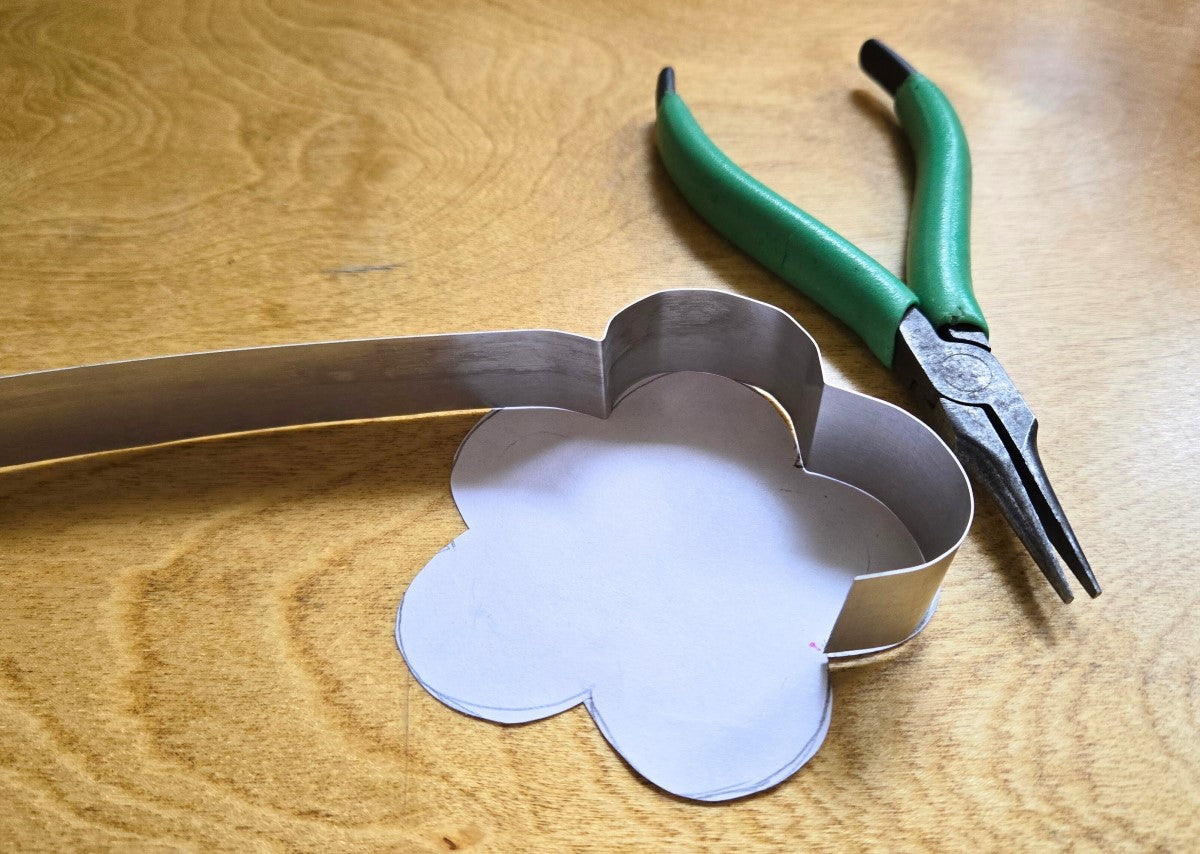
When Alex told me that she wanted to start with 100 cherry blossoms, I knew I would need to make a “cookie cutter.” First I draw the shape I want onto scrap paper, I cut a thin strip of roof flashing, I bend it to match the shape on the paper, and then I affix strips of duct tape to the top edge so that my hands can comfortably press the cutter into clay repeatedly.
Most commercial clays come in 25-pound blocks in each bag, with two bags in a box. I use Highwater’s Little Loafers because it is the clay that works for my methods that is the most locally mined and manufactured. The first step is to use a wire to cut a workable amount of clay from the larger block.
I use a baker’s mat and rolling pin to roll the clay into a thin slab.

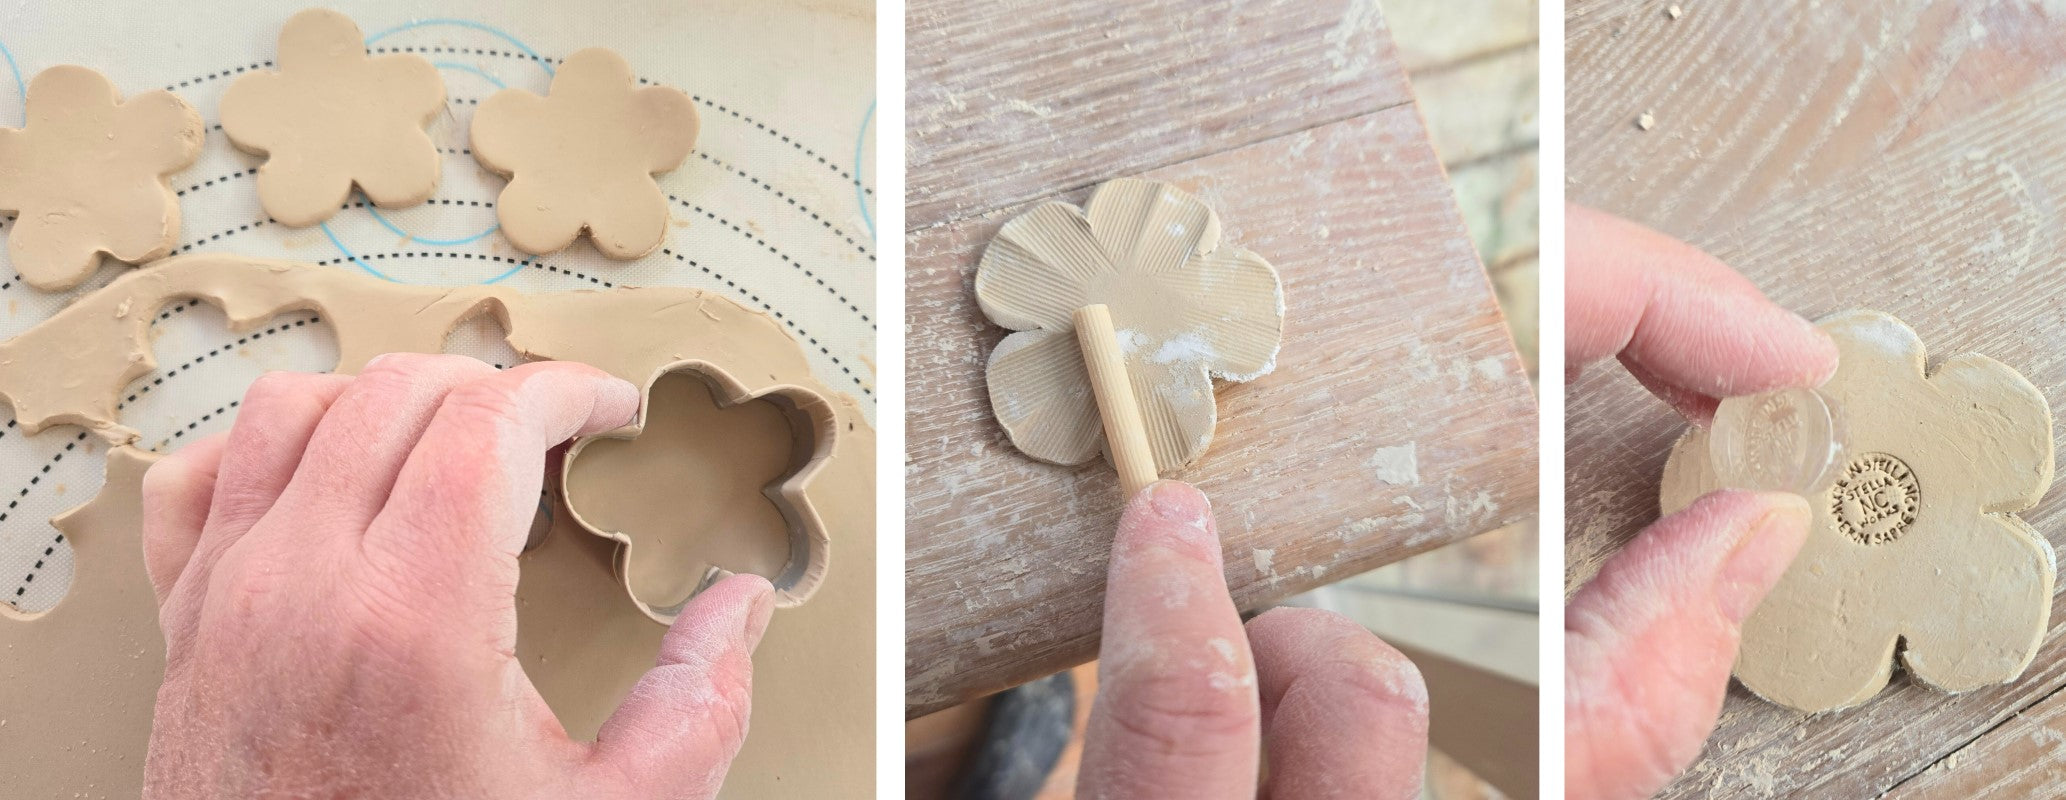
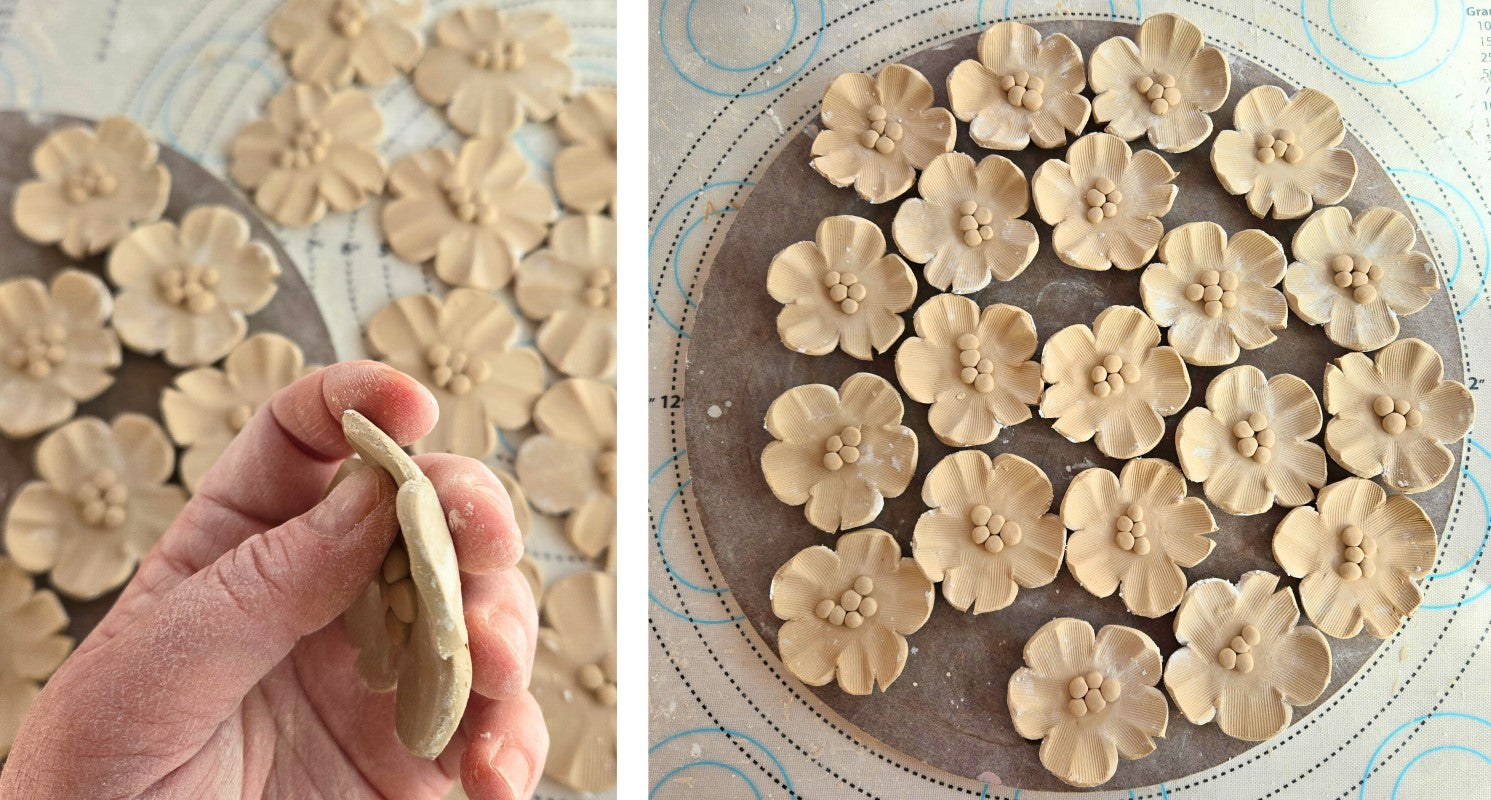
Using my “cookie cutter,” I cut out the flower shapes. Then I apply texture to each.
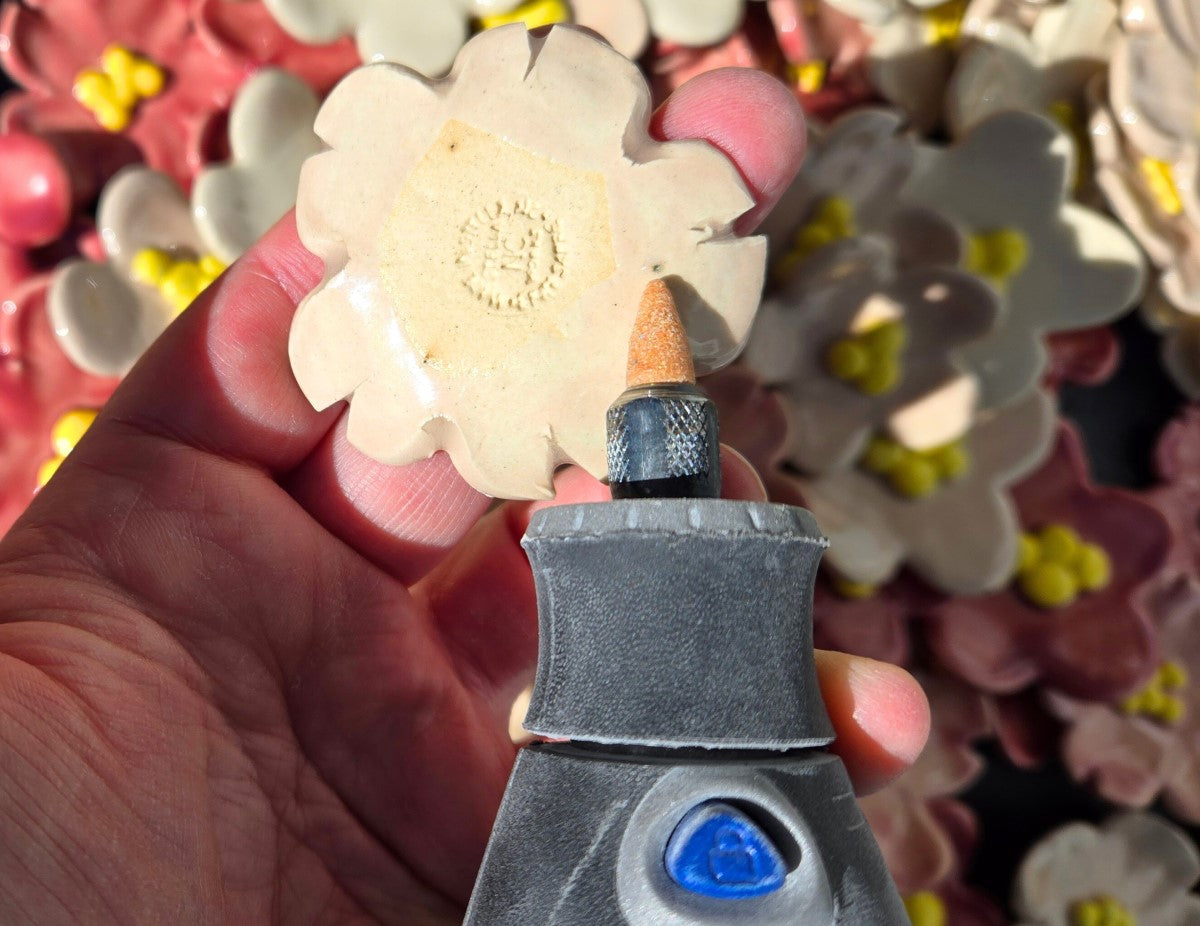
Usually I stamp the back of my work as a “maker’s mark.” These are intended to be glued onto a wall, so to add texture for the back for the glue to grip, my maker’s mark seemed to be the neatest/quickest/easiest solution.
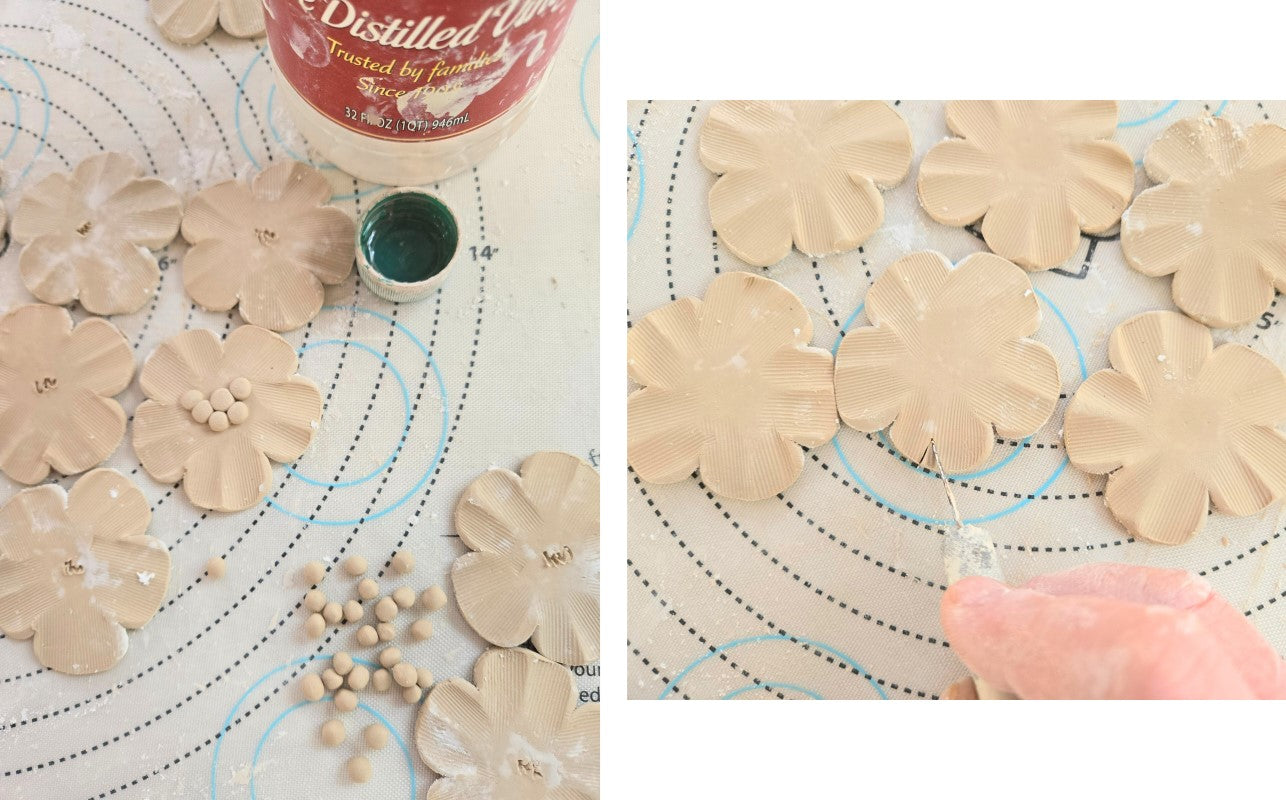
I roll hundreds and hundreds of little balls and apply them to the flower with vinegar. Different potters use different “glue” – some use water, some use clay slip, some use magic water, and some use vinegar. Water or clay slip hydrate the clay where two pieces of clay will join so that they can meld into one piece of clay. Magic water uses sodium silicate and soda ash, which absorb into the clay and make the clay sticky and the bond hard, and also act as a flux to strengthen the bond during firing. Vinegar, an acid, counteracts the alkaline elements of clay that push each other apart, acting as a flocculant that makes the clay particles attract to each other. The chemistry of ceramics is super interesting, but the real reason I use vinegar is that it works, it’s cheap, and I can buy it ready-to-use instead of having to mix it.
I use an Exacto to cut notches in some of the petals.
I bend the edges up slightly and set them on a ware board to dry. These blossoms are thin, and don’t need to dry slowly/evenly to prevent cracks, so they really only take a day or two to dry enough for a bisque fire.
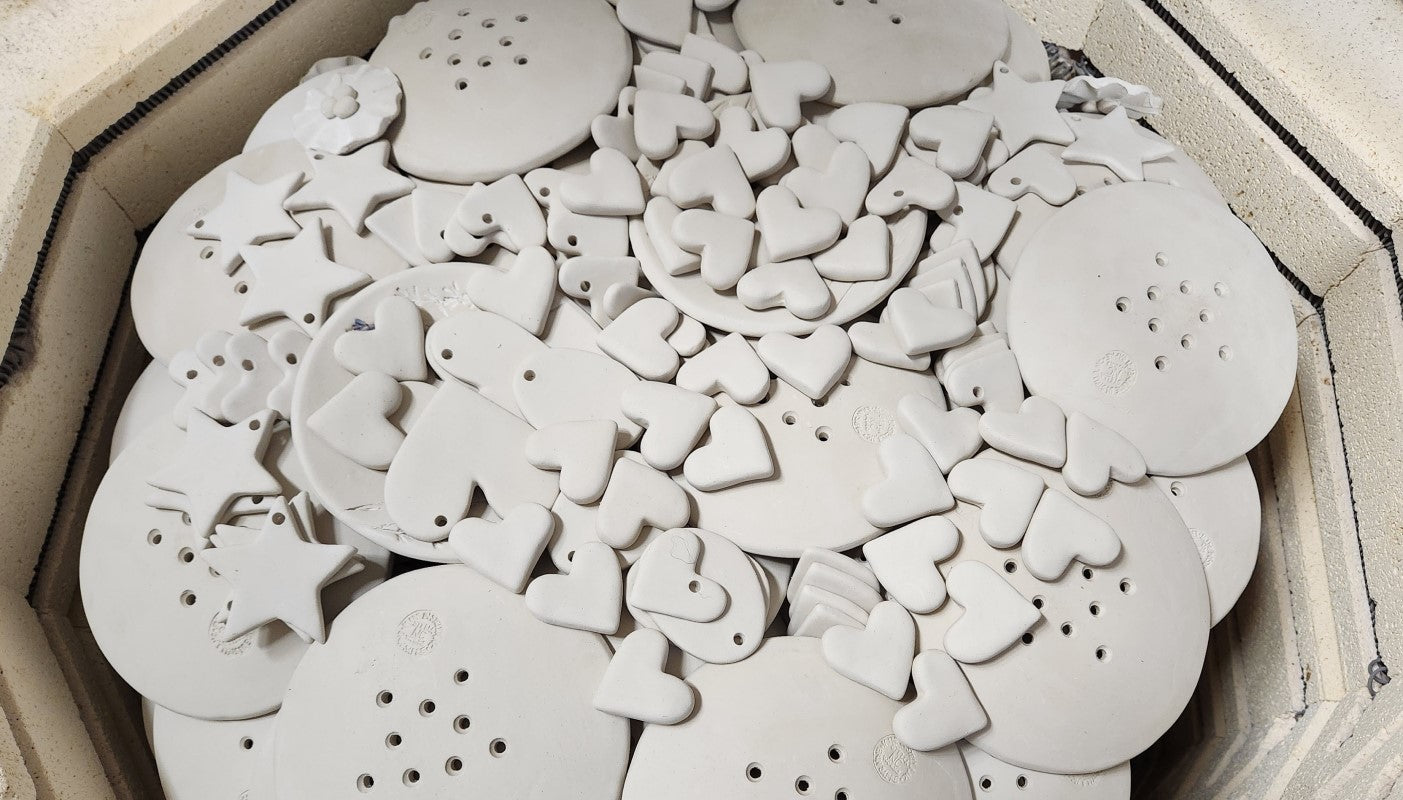
Greenware/bisqueware doesn’t stick to the kiln shelf and doesn’t stick to each other, so I pile small things like flowers into the crevices left by other work. This is a photo of the hearts piled into the crevices of soap dishes because I forgot to take a photo of bisquing the blossoms.
The purpose of the bisque fire is to burn out organic material, making the items more dense and durable, but still unvitrified enough to absorb glaze. The bisque fire takes about 11 hours and 3 minutes, and gets up to around 1,945°F. It takes another approximately 12 hours to cool to 130°F, which is cool enough for my fingers to touch.
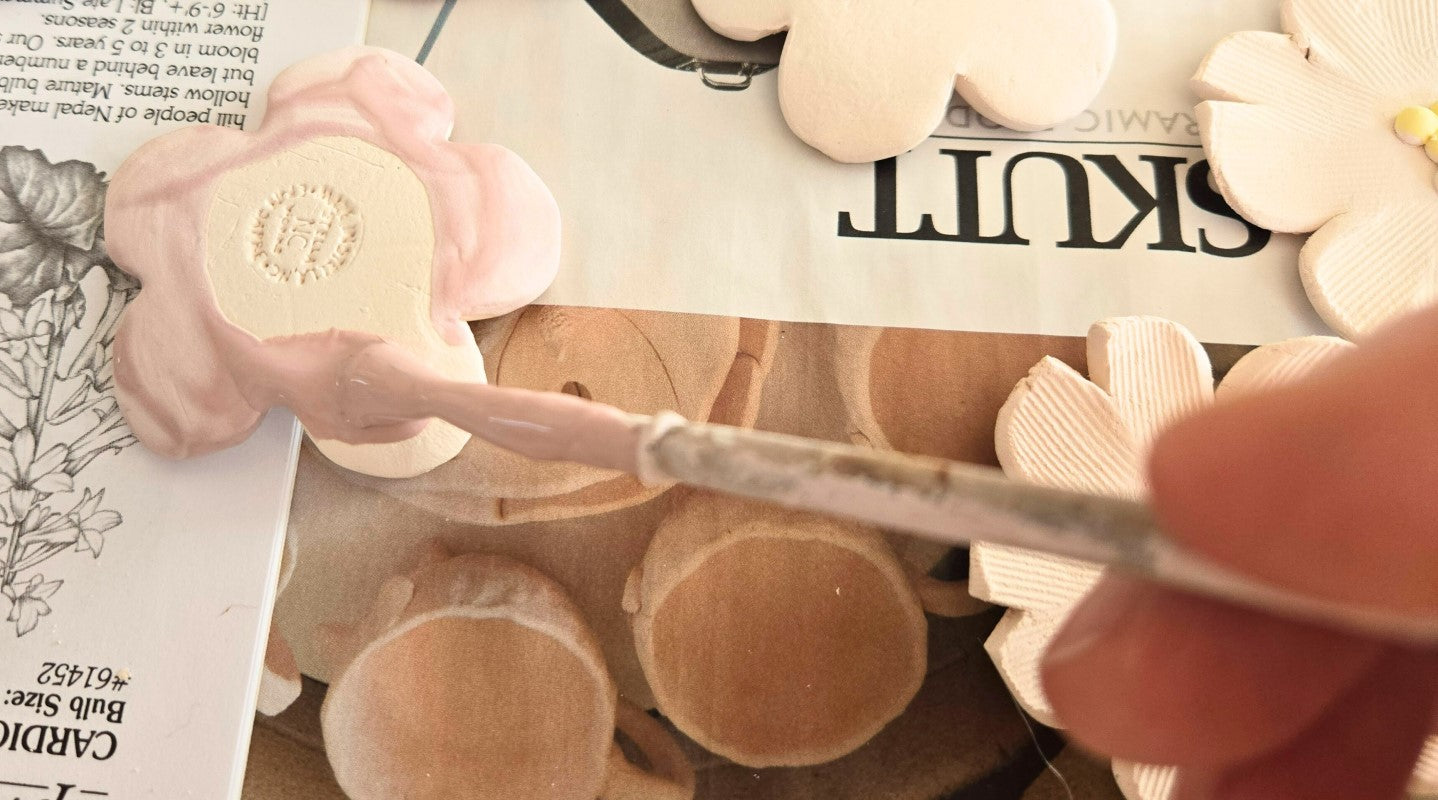
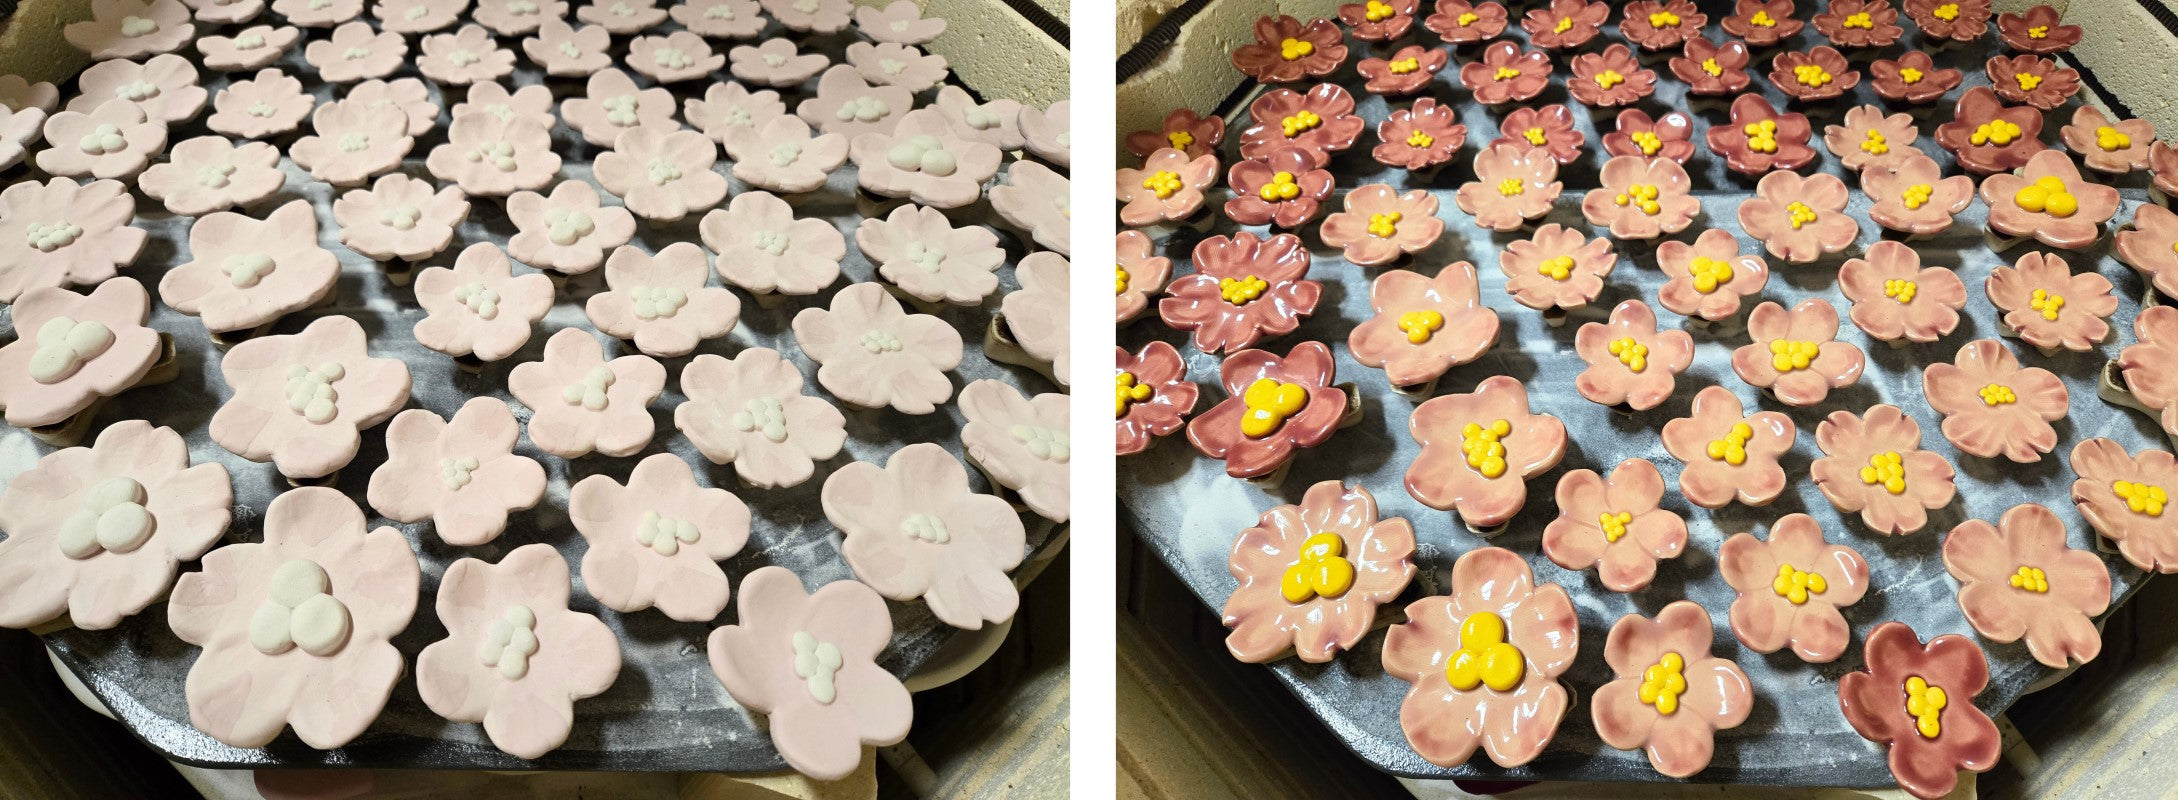
After bisque, I paint one or two layers of glaze on the back of each piece. I’m leaving a big bare area here so that the glue will stick well when UCHMB attaches them to their wall.
Then I flip them over and brush two coats of yellow underglaze onto the stamen, letting the first coat dry before I apply the second coat.
The front side of each blossom gets three coats of glaze, drying fully between each coat.
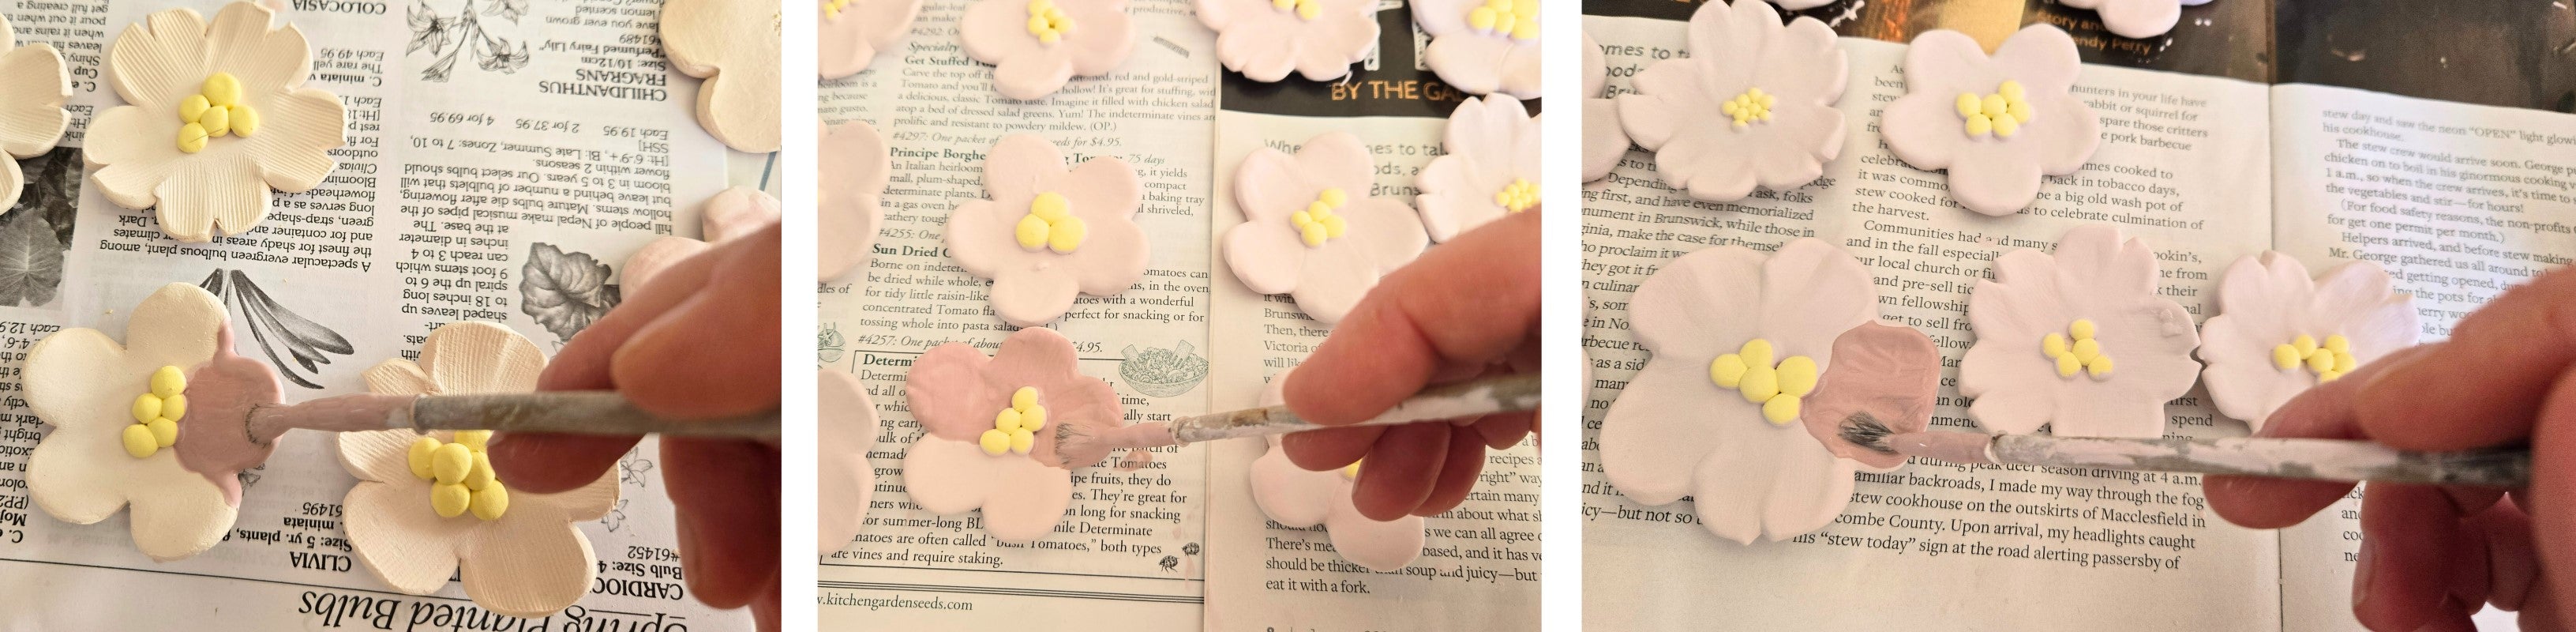
Some of the blossoms get an additional two layers of a darker glaze on the edges. Clear glaze gets brushed over the yellow underglaze.

The purpose of the glaze fire is to meld quartz particles together, turning the final piece into durable stoneware pottery, and the glaze into a durable glassy surface. The glaze fire takes about 8 hours and 13 minutes, and gets up to around 2,232°F. It takes another approximately 12 hours to cool enough to unload the kiln.
I load each blossom into the kiln on a set of stilts. Glaze will stick to the kiln shelf if it touches, so the stilts elevate each blossom above the shelf.
The stilts leave tiny “belly buttons” where each stilt leg touches the blossom. Pulling the stilt away from the blossom often leaves a sharp shard of glaze, like broken glass, which I file down with a Dremmel. This step reduces bloodshed!
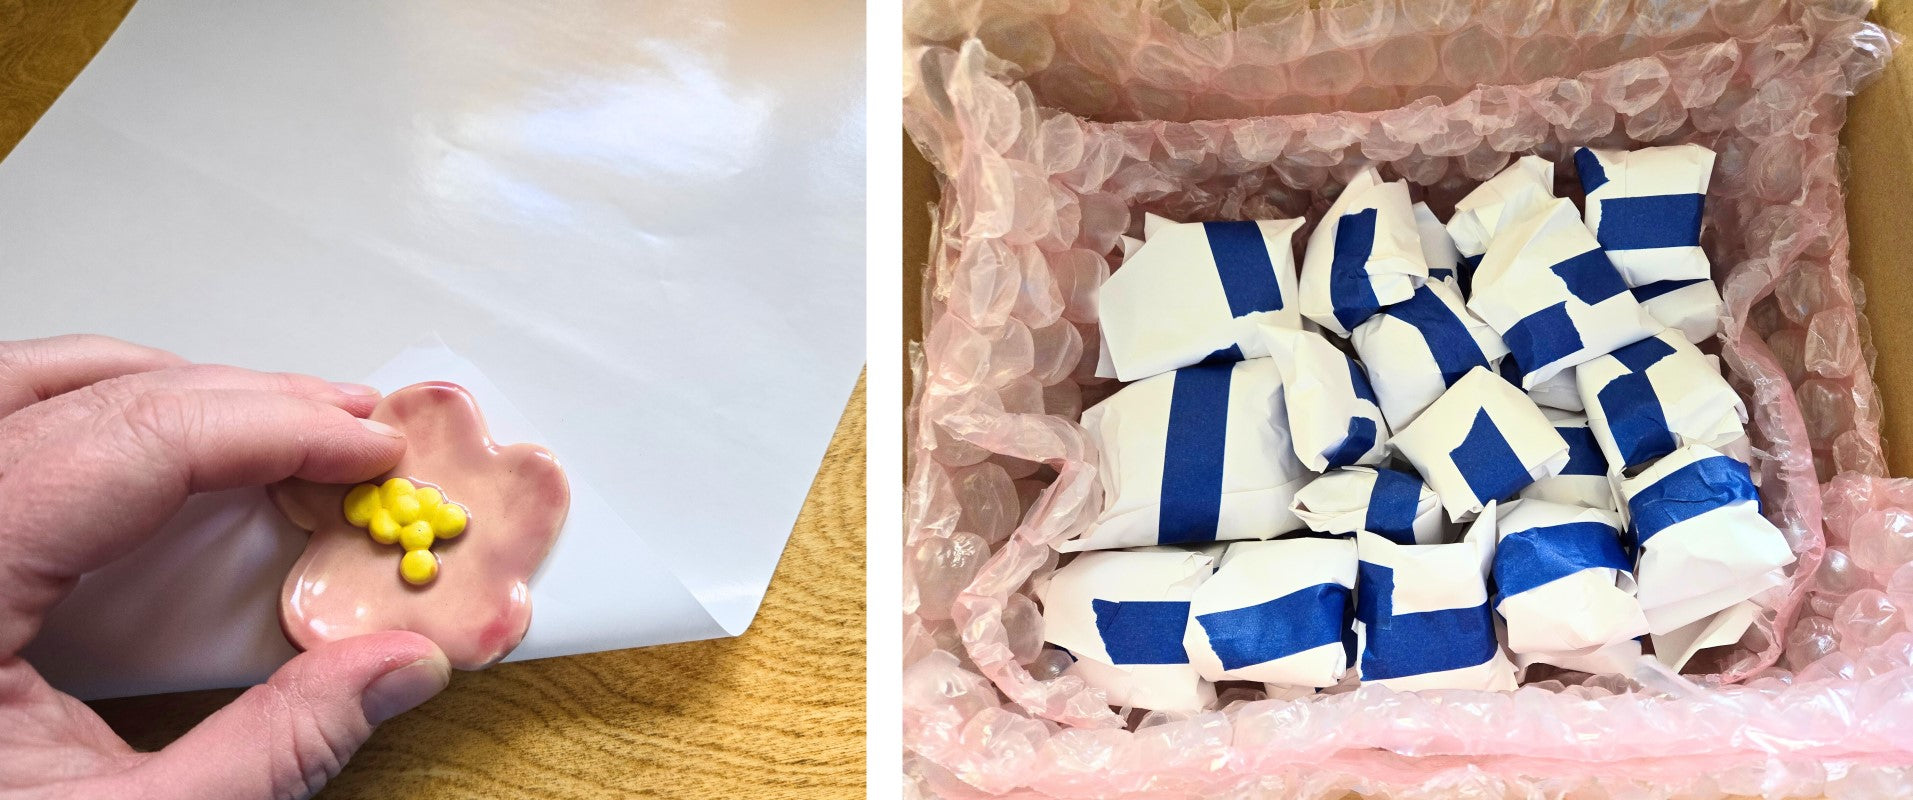
To pack small pieces like these blossoms, I typically reuse the paper that my postage labels come on. I wrap three or four with a layer of paper between each, and then tape each little wrapped package with painter’s tape because it’s easier to remove so there is less risk than having to struggle with strong tape and possibly drop the items. To prevent shipping damage, my rule of thumb is to add 2 inches of cushioning between items and the box walls, on every side. I had a used box that was perfect for the size of this shipment. I have to buy about half of my boxes, but ALL of my cushioning materials are pre-used – I get them from businesses that receive them with shipments and are happy for the materials to be reused instead of going to the landfill and creating demand for manufacture of new materials.
The next chapter of this story will be how UCHMB uses the blossoms in their wall mural! If you haven’t already checked them out, go to https://uchealth.service-now.com/csp?id=mb_about_us.